Kayaking is a great sport for beginners because it’s surprisingly easy to pick up and offers a fun, low-impact way to explore the water. While experts might make it look effortless, it’s a good idea to start slow and build your skills. Renting a kayak is a perfect way to see if you enjoy the activity before you commit to buying your own. You can also take a class to learn the basics of paddling and maneuvering. Mastering these techniques will make your kayaking experience even more enjoyable and help you decide if you want to invest in your kayak for future adventures.
Table of Contents
Is Kayaking Difficult?
No worries! Kayaking is perfect for beginners. You can learn the basics quickly and be out on the water having fun in no time. Just remember, kayaking in rough weather or strong currents is dangerous, even for experts. So stick to calm waters for your first tries.
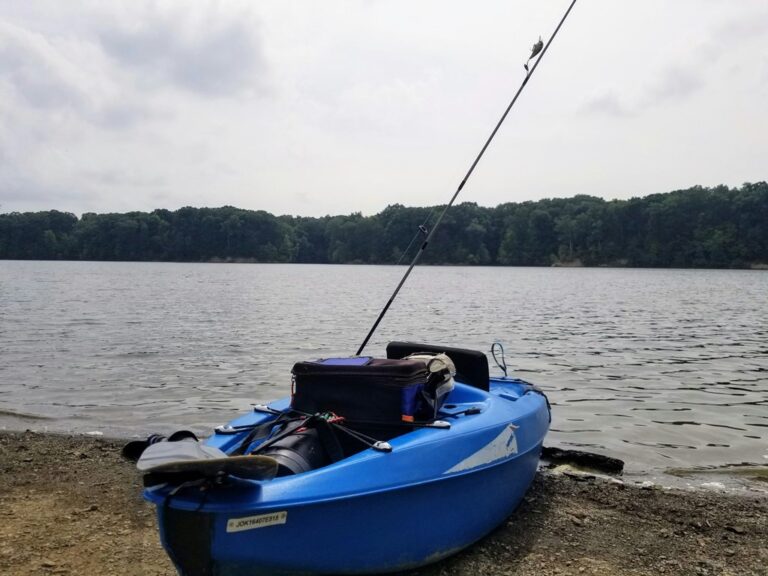
Essential Kayaking Checklist
Here are some things to bring on your first kayaking trip:
- Kayak and paddle (unless you are renting one): This is the most important thing you’ll need!
- Dry bag: A small, waterproof bag that you can fill with your belongings to keep them safe from water. You can put it inside the kayak hatch.
- Water bottle: Bring plenty of water to stay hydrated. You can put it in the kayak hatch or wedge it between your feet.
- Life jacket: This is very important! You should always wear a life jacket when kayaking, no matter what the weather is like.
- Extra clothes: Bring more clothes than you think you’ll need, in case the weather gets cold or wet.
- Kayak car rack (if you have your own kayaks): This will help you transport your kayaks to the lake or river. You can find a guide to choosing the right car rack online.
What Clothes for Kayaking?
Forget bulky clothes! Layering is key to staying comfy on your kayaking trip. Here’s what to wear and why:
First Layer (Against Your Skin):
- Hot weather: A short-sleeved shirt is fine, but pack a long-sleeve for backup.
- Material: Look for synthetic fabrics like polyester or polypropylene. These keep you warm even when wet, unlike cotton.
Second Layer (Middle Layer):
- This can be a fleece jacket or a thicker polyester shirt.
Outer Layer (Protection from Rain/Wind):
- Most waterproof jacket you have: This keeps your inner layers dry and comfy.
Bottoms:
- Cold weather: Wear polyester leggings and waterproof shorts.
- Warm weather: Pack leggings just in case.
Wetsuit vs. Drysuit?
- Skip the wetsuit: It’s designed for warmth in deep water, not paddling on top. It gets cold and stiff when wet, and makes it hard to move.
- A drysuit is the way to go: This keeps you completely dry, no matter what.
- Beginner? No worries! Use waterproof clothes you already have.
Remember: Dress for the water temperature, not the air. Water can be surprisingly cold, even on hot days. Pack extra clothes in case the weather changes. Hypothermia (getting too cold) is a danger, so stay warm and dry!
Kayak Parts Simplified
You might be surprised by all the different parts of a kayak! But don’t worry, most of them have easy-to-understand names. Let’s break it down:
- Front: This is the pointy part of the kayak, called the bow.
- Back: The opposite of the bow is the stern.
- Top: The whole top surface of the kayak is the deck. You might already know this one!
- Storage Compartments: Hatches on the deck, called deck hatches, let you store things like food, clothes, or gear you want to keep dry.
- Steering Fin: The fin-like thing at the back of the kayak that helps it go straight is called a rudder or skeg.
- Deck Lines: These are stretchy cords on the deck, sometimes called bungees or shock cords, where you can secure extra gear.
- Seat: The area where you sit inside the kayak is called the cockpit.
- Footrests: The adjustable pedals you push against with your feet are called foot pegs or foot braces.
- Side Hugs: Those curvy plastic pieces inside the cockpit that hug your thighs are called thigh braces. They should fit snugly for better control.
How to get into a Kayak
Getting in and out of your kayak can feel tricky at first, but with a little practice, you’ll be a pro! Here’s how to do it from different spots:
Sandy Beach Entry (Easiest):
This is the simplest way! Just walk the kayak in until it’s shallow enough, then hop in and paddle away. Push off the beach with your arms to get started.
Docking In:
- Paddle your kayak alongside the dock, keeping it nice and parallel.
- Grab the dock with your hands for stability.
- In one smooth motion, swing your legs into the kayak and turn to face the front (bow).
- Lower yourself quickly into the seat and plop down. This will help you find your balance.
- Once seated, adjust your feet for comfort.
Re-entering from the Water (Trickiest):
- If you tip over, flip your kayak upright first to keep out water.
- Grab your paddle and secure it to the deck lines (bungee cords).
- Hold onto the rim of the cockpit with both hands (one near, one far).
- Kick your legs to give yourself a boost and pull yourself up onto the kayak, landing on your chest.
- Scoot your bum onto the seat first for better balance.
- Twist your body around and slide fully into the seat.
- Adjust your feet and practice this in shallow water before heading out deep.
Remember, practice makes perfect! Try these techniques in calm, shallow water until you feel comfortable and confident.
Kayak Paddling Basics
Here’s how to hold your kayak paddle for a smooth and efficient ride:
- Hand Position: Grip the paddle shaft 6 to 12 inches (about the width of your hand) away from the blade.
- Relaxed Grip: Hold the paddle firmly, but not too tight. You want a secure grip that lets you move your hands easily.
- Knuckle Check: Make sure your knuckles line up with the edge of the paddle blade. This helps you apply power through the whole stroke.
- 90-Degree Check: Hold the paddle shaft straight up over your head. If your elbows bend at a 90-degree angle, you’ve got the right-hand placement!
Moving Forward with Powerful Strokes
Now you’re ready to paddle! Here’s the basic forward stroke:
- Twist and Unwind: Twist your torso slightly in the direction opposite where you want to go (like winding up for a throw).
- Dip and Push: Dip the paddle blade into the water with the top hand pushing and the bottom hand pulling.
- Unwind for Power: Unwind your torso as you pull the paddle through the water. Imagine you’re untwisting a towel to wring it out.
- Exit at the Hip: When your top hand reaches the hip level, lift the paddle out of the water.
Remember: The power comes from your torso twist, not just your arms.
Turning with Ease: The Sweep Stroke
Ready to change direction? Here’s a simple turning stroke called the sweep stroke:
- Wide Entry: Start your stroke further out in front of the kayak than usual.
- Sweeping Motion: Make a big, sweeping C-shaped stroke with the blade, pulling it all the way back near the stern (the back of the kayak).
- Opposing Direction: Sweep the paddle on the side opposite where you want to turn. For a sharper turn, only sweep on one side.
- Forward Momentum Turn: For a smoother turn with some forward motion, sweep on the side opposite your turn and then do a normal forward stroke on the other side.
Practice these basic strokes in calm water to get comfortable and confident before heading out on your kayaking adventure!
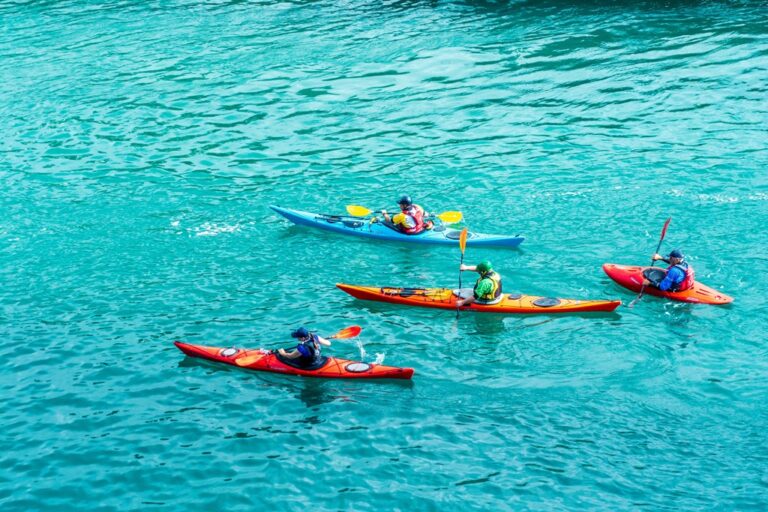
Kayaking versus Canoeing: The Differences
Canoeing and kayaking are both fantastic ways to get out on the water and explore nature. But which one is right for you? Here’s a breakdown to help you decide:
Canoes: Ideal for Relaxing Group Adventures
- Perfect for multi-day trips: Canoes are big and roomy, allowing you to pack plenty of gear for longer excursions.
- Great for families: Take the kids! You can comfortably fit two adults and children in most canoes.
- Easy portaging: Canoes are lighter than kayaks and can be flipped over and carried on your head between lakes.
- Relax in comfort: Stretch out your legs, sit back, and enjoy the scenery!
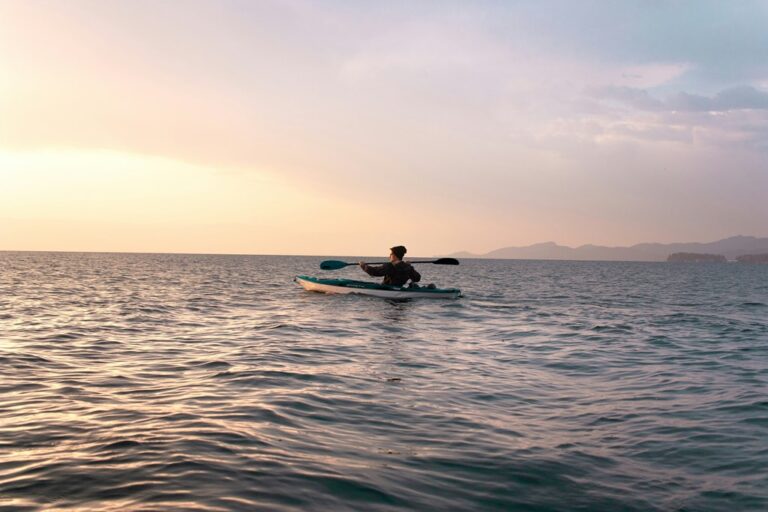
Kayaks: Perfect for Solo Exploration and Efficiency
- Super stable: Kayaks are less likely to tip over, even in windy or choppy conditions.
- Travel faster and farther: Explore more ground with a kayak’s sleek design and efficient paddling style.
- Maneuver with ease: Navigate around obstacles and tight spaces with a kayak’s nimble handling.
- Keep your gear dry: Most kayaks have built-in storage compartments to keep your belongings safe from splashes.
- Solo paddling: Kayaks are designed for single paddlers, making them a great choice for independent adventures.
So, which one should you choose?
If you’re looking for a relaxing group adventure with plenty of space for gear and passengers, a canoe might be the way to go. But if you crave a more solo-friendly experience with speed, manoeuvrability, and weather resistance, then a kayak could be your perfect match!
Beginner Safety Tips
Kayaking is a fun way to explore the water, but safety always comes first. Here are some key things to remember:
- Can You Swim? Yes! Knowing how to swim is important in case you tip over in deep water.
- Life Jacket: Always wear a life jacket, no exceptions! Even Fido the dog needs a life vest.
- Sun Protection: Don’t forget sunscreen on a sunny day!
- No Booze While You Cruise: Alcohol and paddling don’t mix.
- Dress for the Water: Wear clothes that are good for the water temperature, and pack extra layers in case it gets chilly.
- Buddy Up! Kayaking with a friend is always safer than going solo.
- Pick Your Spot: Choose calm waters like bays, quiet lakes, or slow rivers for your first adventures.
- Confidence is Key: Only paddle in water you’d feel comfortable swimming in.
- Practice Makes Perfect: Learn how to get back into your kayak from the water in shallow water before heading out deep. If you can’t climb back in easily, stay close to shore so you can swim back if needed.
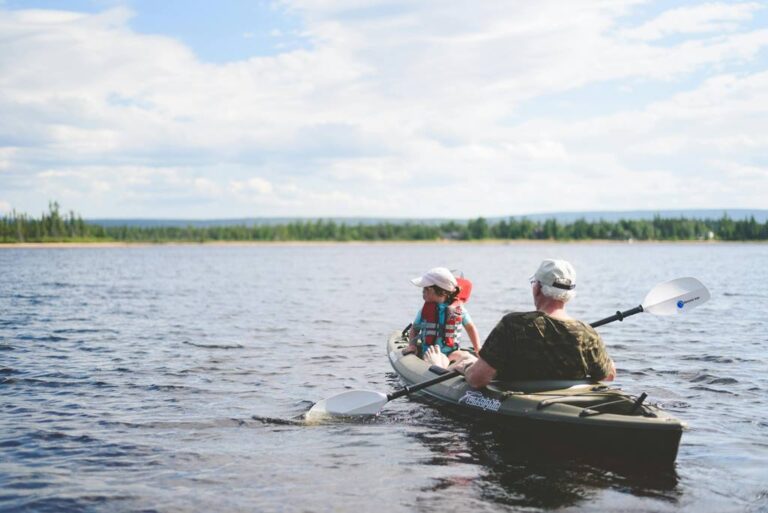
Kayaking with Kids: Fun for the Whole Family!
Taking the kids kayaking can be a great adventure, but here are a few things to keep in mind:
- Seating: If your kids have kayaked before, they might enjoy their own seat in a double kayak. Otherwise, they can cuddle up in your lap.
- Dress Warm: Pack extra layers for your kids. They get cold faster than grown-ups on the water!
- Life Jacket Safety: Make sure your child wears a life jacket that fits snugly. It’s like a super important hug from the water!
- Kid-Sized Paddle: If your little one wants to help paddle, get them a special kid-sized paddle that’s easier for them to use.
- Snacks and Breaks: Pack plenty of drinks and snacks to keep your little adventurer happy. Take breaks often to explore the shore and let them stretch their legs.
- Beat Boredom: Kids can get restless quickly. Pack some games or toys to keep them entertained on the water.
Kayaking for Fitness
Ever feel sore after a day of kayaking? That’s your muscles telling you they got a workout! Kayaking is a great way to build muscle, especially in your:
- Back: The paddling motion works your back muscles to propel you through the water.
- Arms and Shoulders: You’ll use your arms and shoulders a lot while paddling, giving them a good workout.
- Core: The twisting motion of your torso as you paddle strengthens your core muscles.
- Legs: Pushing against the foot brace with each stroke engages your leg muscles.
And that’s not all! Kayaking is also a fantastic cardio exercise that gets your heart rate up and keeps you healthy.