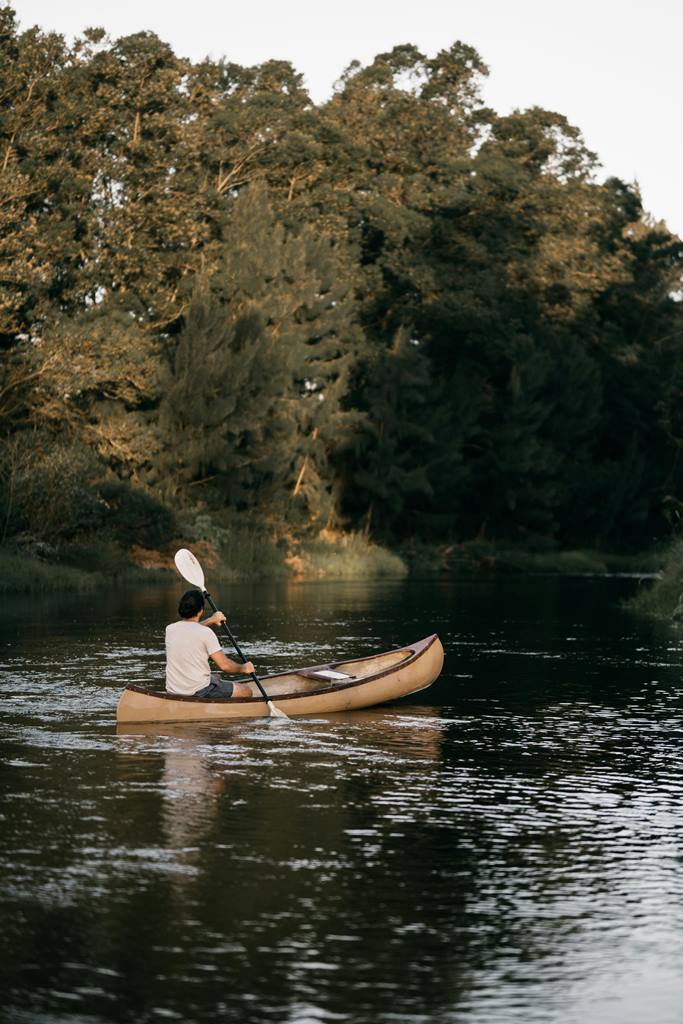

Welcome to our “Kayaking Beginner’s Guide” – your step-by-step path to turning this peaceful scene into your new adventure.
Table of Contents
Before diving in, thoughtful preparation is key. While you might not rush out to buy a kayak immediately, it’s an option worth considering. Here are some practical steps to help you ease into the world of kayaking:
- Rent or Borrow a Kayak: Start by renting or borrowing a kayak from a local outfitter or a friend. This way, you can get a feel for different types of kayaks and understand what suits you best without committing to a purchase.
- Take a Class: Sign up for a beginner’s kayaking class. Many outdoor stores and local clubs offer lessons that cover the basics of paddling, safety, and essential techniques. This is a great way to build confidence and learn from experienced instructors.
- Join a Kayaking Group: Connect with local kayaking groups or clubs. These communities are filled with passionate paddlers who can offer advice, share their experiences, and even invite you on group outings. It’s a fantastic way to learn and make new friends.
- Explore Different Waters: Try kayaking in various environments, from calm lakes to gentle rivers. This helps you understand different water conditions and how they affect your paddling experience.
- Invest in Basic Gear: While renting is great for starting, investing in basic gear like a quality paddle, life jacket, and dry bag can enhance your experience. These items are crucial for safety and comfort on the water.
- Learn Kayak Maintenance: Understanding how to care for a kayak is essential if you plan to own one. Learn basic maintenance skills to keep your kayak in good condition and extend its lifespan.
- Stay Safe: Always prioritize safety by wearing a life jacket, checking weather conditions, and informing someone about your kayaking plans. Safety should always be your top priority.

Kayak Clothing & Essentials Gears
This article focuses on using a traditional kayak with a cockpit and storage hatches. However, if you’re kayaking in warm conditions, your guide or friend might suggest a wide, stable kayak without a cockpit.
When gearing up for a kayaking adventure, it’s essential to have the right equipment. Here’s a checklist to ensure you’re fully prepared:
Essential Kayaking Gear
Anyone providing you with a kayak should also supply these must-have items:
- Coast Guard-approved PFD (Personal Flotation Device): Make sure it fits you properly for maximum safety.
- Paddle: Check that it’s the right size for you before heading out.
- Bilge Pump: Essential for removing water from your kayak.
- Spray Skirt: Optional on warm, calm days, but handy to have.
Proper Clothing for Warm-Weather Kayaking
For a comfortable and safe experience, bring these clothing items:
- Swimwear or Shorts: Choose non-cotton and non-binding options.
- Rashguard Top: Short or long-sleeve, any non-cotton top will work.
- Neoprene Footwear: To keep your feet protected and warm.
- Sun-Shielding Hat: To protect yourself from the sun.
- Lightweight Fleece Jacket or Vest: Depending on the weather conditions.
- Spray Jacket or Rain Jacket and Pants: Useful if the weather turns chilly.
If the temperature drops below 60°F, especially the water, don’t forget your wetsuit. For more tips, check out our guide on What to Wear Kayaking.
Personal Items You Can’t Forget
If you’re familiar with the Ten Essentials, many of these will be second nature:
- Plenty of Water: Stay hydrated throughout your trip.
- Snacks and Lunch: Pack energy-boosting snacks and a hearty lunch for longer paddles.
- Sunscreen, Lip Balm, and Sunglasses: Ensure you have a retainer for your sunglasses.
- First-Aid Kit: Always be prepared for minor injuries.
- Signalling Whistle: For safety and emergencies.
- Watch: Keep track of time to ensure you get back before dark.
- Headlamp: Essential if you’re kayaking late or in low light.
- Dry Bags: Keep your valuables and essentials dry.

Fit Your Kayak Right
A well-adjusted kayak makes for a stable and comfortable paddling experience. Adjusting your kayak while it’s on dry land is key. Focus on three main points of contact for the best fit:
- Seat Adjustment:
- Sit firmly with your butt snug against the seatback.
- If your kayak allows, fine-tune the seat or seatback angle for comfort.
- Aim to sit upright for optimal balance and paddling power.
- Foot Pegs:
- Place the balls of your feet on the footpegs.
- Ensure your knees have a slight bend.
- Adjust the footpegs by tilting and sliding them along their track until they reach preset stopping points.
- It’s often easier to adjust the pegs when you’re out of the kayak.
- Knee Position:
- Ensure your bent knees firmly contact each side of the cockpit.
- This firm contact helps you control the kayak’s side-to-side motion while paddling.
- Your fit should be snug but not so tight that you can’t exit the kayak if it capsizes.
Launching Your Kayak
Most kayaking trips begin with a launch from a gently sloping shoreline. To protect your kayak’s hull, especially on rocky, sandy, or cement surfaces, follow these steps:
- Get to the Water:
- Get a friend to help you carry your kayak to the water’s edge.
- Place the kayak in shallow water, perpendicular to the shore. (For river launches or long kayaks, a parallel launch might be better.)
- Position the bow facing away from the shore and the stern close to the shore, ensuring it is fully afloat.
- Prepare to Enter:
- Tuck one of your paddle blades under the deck line in front of the cockpit, letting the shaft extend like an outrigger.
- Stand over the kayak, straddling the cockpit.
- Get In:
- Hold the cockpit rim and sit down in the seat.
- Lift your legs and slide your feet into the cockpit.
- Scoot back firmly into the seat and place your feet on the foot pegs.
- Launch:
- Grab your paddle to push off from the shore, moving past any incoming waves or wakes.
- Attach your spray skirt if you have one.
- Getting Out:
- When it’s time to exit, paddle back to your launch position, set up your outrigger, and reverse the steps until you’re straddling your kayak again.
How to Grip Paddle
Start by grabbing your paddle and holding it above your head. Your hands are in the right spot when your elbows form a 90-degree angle.
Next, lower your paddle and make sure you’re holding it correctly:
- Ensure the paddle blades line up with each other. If they’re not, your paddle might be “feathered.” Adjust the blades using the push-button or twist setting in the middle of the shaft. (Feathered blades slice through the wind better but can be tricky for beginners.)
- Check that the longer edge of each blade is on top. This helps your paddle move smoothly and efficiently through the water. If the blades are uniformly shaped, either side can be up.
- Make sure the scooped sides of the blades face you. The curvature is subtle, so look closely.
- Place your large knuckles on top of the paddle shaft, aligning them with the top of the blades.
- Relax your grip. Form an “O” with your thumb and index finger, and let your other fingers rest lightly on the shaft. A tight grip tires your hands quickly and isn’t necessary.
Kayaking Strokes to focus
When learning to kayak, mastering the strokes and navigation is crucial. Here are the keystrokes to focus on:
The Forward Stroke
You’ll use this stroke the most, so getting it right is important:
- Catch Phase: Twist your torso and plunge the blade fully into the water near your feet.
- Power Phase: Rotate your torso as the blade moves back. Watch the blade in the water and your torso will naturally follow. Push against the paddle shaft with your top hand as you move.
- Release Phase: Once your hand reaches just past your hip, lift the blade out of the water in a slicing motion.
To repeat, just dip the blade near your feet again, and your torso will already be in the right position.
Pro Tip: Keep the paddle shaft at a comfy angle by pretending to “check the time” on an imaginary watch on your upper wrist.
The Reverse Stroke
This stroke is your basic braking move, and it can also move you backwards if you’re stopped. It’s the reverse of the forward stroke:
- Dip the blade near your hip.
- Push with your bottom hand.
- Slice the blade out near your feet.
The Sweep Stroke
This stroke helps you turn. Doing forward strokes on one side makes the kayak turn the opposite way. The sweep stroke enhances this effect by making the blade path much wider on the side of the boat. Sweep on the right to turn left, and sweep on the left to turn right.
Kayak Control with Rudders & Skegs
Rudders:
Rudders sit at the back of your boat and are controlled by foot pedals. When you push the right pedal, your boat turns right. Push the left pedal, and your boat turns left. It’s as simple as steering a car but with your feet!
Skegs:
A skeg is a fin that drops down from the bottom of your boat to help keep it moving straight, especially in windy conditions. Unlike rudders, skegs don’t steer; they keep you on course.
For Beginners:
Many beginners struggle with using rudders and skegs correctly. They often forget to pull them up in shallow water, which can cause damage. For this reason, it’s usually best to keep them undeployed at first. Paddling without a rudder or skeg helps you develop better technique faster.
If it’s so windy that you feel you need a rudder or skeg, it’s a sign that you should be out on the water with an experienced guide. They can show you how to use these tools properly and keep you safe in challenging conditions.

Additional Safety Tips on Non-Guided Tour
Bringing the right gear and clothing is crucial when heading out on the water. If you’re on a non-guided tour, here are some extra safety tips to keep in mind:
1. Bring a Paddling Buddy: Always paddle with a friend. They can call for help or assist you if needed.
2. Stay Together: Make a pact to stick together. A buddy out of sight or earshot can’t help in an emergency.
3. Know Your Limits: If you haven’t had rescue training, don’t paddle farther from shore than you can easily swim. Near-shore areas are usually more interesting anyway.
4. Do Your Research: Talk to local paddlers about places to avoid and get information on currents, tides, and weather forecasts.
5. Dress for the Water: Always dress for a possible capsize. If the water is 60°F or colder, wear a wetsuit.
6. Check Your PFD: Make sure your personal flotation device fits snugly but doesn’t interfere with your breathing. If you need to remove a layer due to heat, paddle to shore first. Never remove your PFD from the water.
7. Use Spray Skirts Wisely: Don’t wear a spray skirt unless you know how to properly remove it and do a wet exit.
8. Bring a Whistle: The universal distress signal is three long blasts. Always have a whistle handy.
9. Consider Training: Take a rescue class if you plan to kayak regularly. Classes on navigation, tides, currents, and surf can help you stay out of trouble.
Tips for Kayak Newbies
Planning Your First Solo Kayak Trip? Keep It Simple:
1. Pick the Right Spot: Start with a small, calm lake or pond where there’s little to no boat traffic.
2. Easy Launch: Choose a gently sloping, sandy beach for launching. Avoid steep, muddy, or rocky shores—they’re tough to handle.
3. Perfect Weather: Go out on a sunny, windless day to keep things easy and enjoyable.
4. Wind Tips: If it’s breezy, paddle into the wind at the start. This way, you’ll have the wind at your back when you’re heading home, making it much easier.
5. Keep It Short: Plan for a fun outing, not a marathon. Aim for less than two hours on the water to keep it enjoyable without getting too tired.